Package Group Selection
After your partitions have been selected and configured for formatting, you are ready to select packages for installation.
 | Note |
|---|---|
Unless you choose a custom installation, the installation program will automatically choose most packages for you. However, you must select either GNOME or KDE (or both) to install a graphical environment. |
GNOME and KDE are both graphical desktop environments[1] that handle the overall look and feel of your system. You must choose one of these to have a default graphical setup, but you can also install both to determine for yourself which you prefer.
You can select components, which group packages together according to function (for example, C Development, Networked Workstation, or Web Server), individual packages, or a combination of the two.
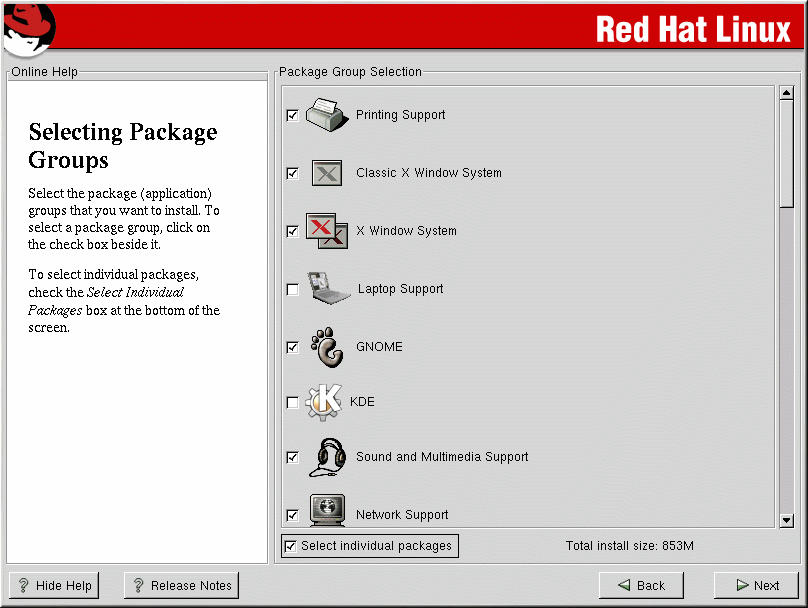
To select a component, click on the checkbox beside it (see Figure 3-16).
Select each component you wish to install. Selecting Everything (at the end of the component list) during a custom installation installs all packages included with Red Hat Linux. If you select every package, you will need approximately 1.7 GB of free disk space.
To select packages individually, check the Select Individual Packages box at the bottom of the screen.
Selecting Individual Packages
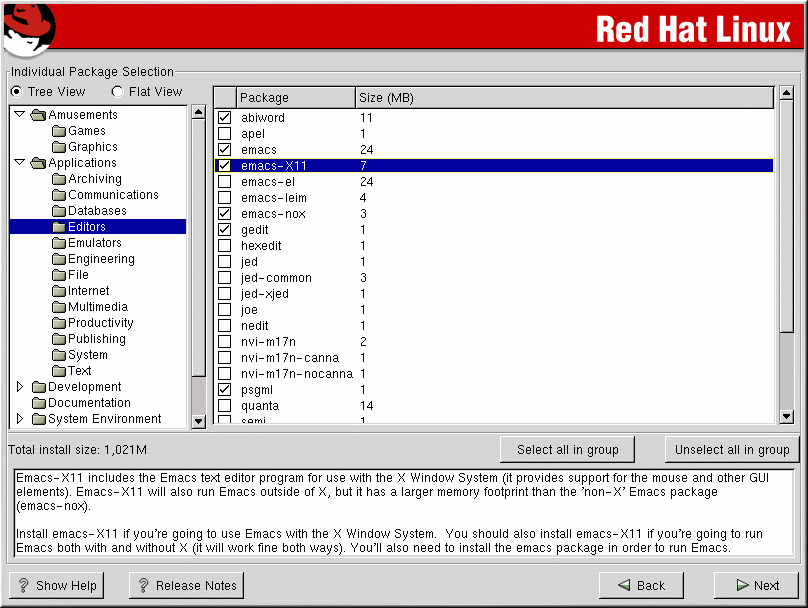
After selecting the components you wish to install, you can select or deselect individual packages. You can select or deselect packages using your mouse (see Figure 3-17).
You can choose to view the individual packages in tree view or flat view.
Tree view allows you to see the packages grouped by application type.
Flat view allows you to see all of the packages in an alphabetical listing on the right of the screen.
Using Tree view, you see a listing of package groups. When you expand this list and pick one group, the list of packages in that group appears in the panel on the right.
To sort alphabetically, click on the Package tab. To sort packages by size, click on the Size (MB) tab.
To select an individual package, double-click the checkbox beside the package name. A check mark in the box means that a package has been selected.
For more information about a specific package, click on the individual package name. The package information will appear at the bottom of the screen.
You can also select or deselect all packages listed within a particular group, by clicking on the Select all in group or Unselect all in group buttons.
 | Note |
|---|---|
Some packages (such as the kernel and certain libraries) are required for every Red Hat Linux system and are not available to select or deselect. These base packages are selected by default. |
Unresolved Dependencies
Many software packages, in order to work correctly, depend on other software packages that must be installed on your system. For example, many of the graphical Red Hat system administration tools require the python and pythonlib packages. To make sure your system has all the packages it needs in order to be fully functional, Red Hat Linux checks these package dependencies each time you install or remove software packages.
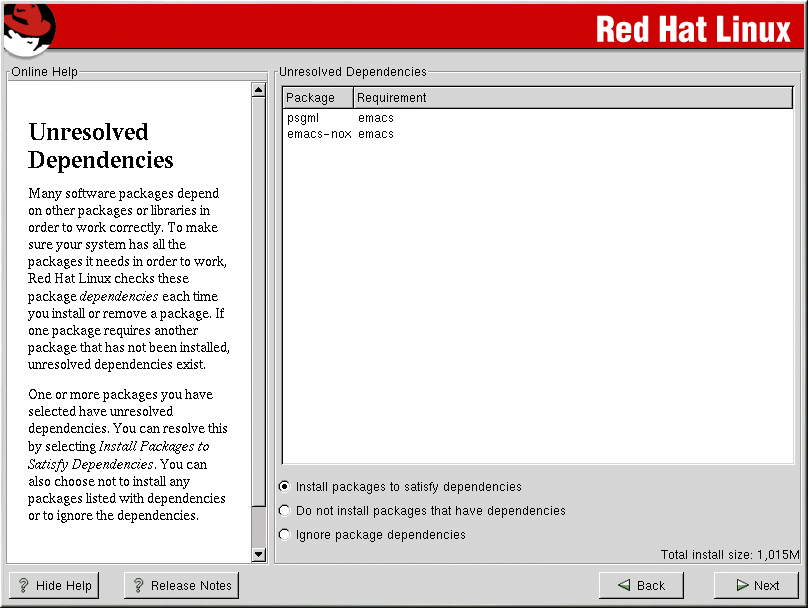
If any package requires another package which you have not selected to install, the program presents a list of these unresolved dependencies and gives you the opportunity to resolve them (see Figure 3-18).
The Unresolved Dependencies screen appears only if you are missing packages that are needed by the packages you have selected. At the bottom of the screen, under the list of missing packages, an Install packages to satisfy dependencies checkbox is selected by default. If you leave this checked, the installation program will resolve package dependencies automatically by adding all required packages to the list of selected packages.


